Best Way to Fix a Hole in the Wall
- h455an
- Jun 19, 2024
- 4 min read
Updated: Apr 5
Whether it's a doorknob, an accident, or a failed DIY project, holes in walls are a common household issue. The good news is, repairing these holes can be straightforward and cost-effective. This guide will walk you through the steps to fix holes in plasterboard (also known as drywall or wallboard), ensuring your walls look as good as new.

Tools and Materials You'll Need To Fix a Hole in the Wall
Before you start, gather the following tools and materials:
Utility knife
Drywall saw
Sandpaper (medium and fine grit)
Joint compound
Drywall patch or scrap drywall
Drywall tape (if using a patch)
Putty knife
Paint and primer (to match your wall)
Dust mask and safety goggles
Step-by-Step Guide to Repairing a Hole in Plasterboard
Step 1: Assess the Damage
Determine the size and extent of the hole. Small holes (less than 1/2 inch) can be filled with spackle or joint compound, while larger holes will require a patch.
Step 2: Prepare the Area
For larger holes:
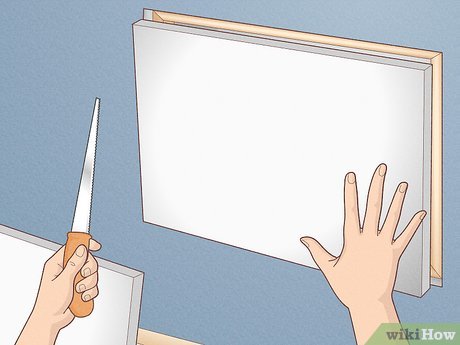
Use a utility knife or drywall saw to cut a clean, square, or rectangular hole around the damaged area. This will make it easier to fit the patch.
For smaller holes:
Use sandpaper to smooth the edges and create a surface for the compound to adhere to.
Step 3: Install the Patch
For Small Holes (Less than 1/2 inch):
Apply spackle or joint compound directly to the hole using a putty knife.
Smooth the surface and let it dry.
Sand the area until it's flush with the wall.
For Medium Holes (1/2 inch to 6 inches):
Use a mesh drywall patch. Place the patch over the hole and secure it with drywall tape if necessary.
Apply joint compound over the patch, feathering the edges to blend with the surrounding wall.
Let it dry, then sand smooth.
For Large Holes (Greater than 6 inches):
Cut a piece of drywall to fit the hole. It should be slightly smaller than the opening.
Place the drywall patch into the hole and secure it with screws if needed.
Apply drywall tape around the edges of the patch.
Cover the tape with joint compound, feathering the edges to blend with the wall.
Allow to dry, then sand smooth.
Step 4: Apply Joint Compound
Apply a thin layer of joint compound over the repaired area using a putty knife. Smooth it out to blend with the wall. You may need to apply multiple layers, allowing each layer to dry and sanding between applications.
Step 5: Sand the Area
Once the final layer of joint compound is dry, sand the area with fine-grit sandpaper until smooth. Ensure the repaired area is flush with the surrounding wall.
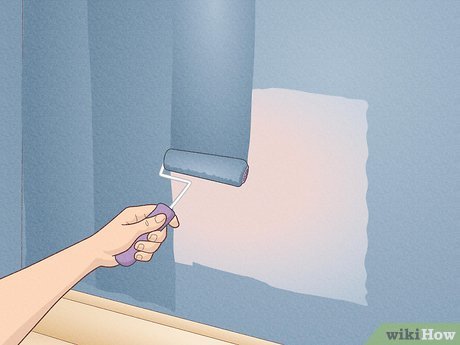
Step 6: Prime and Paint
Prime the repaired area to seal the joint compound and prevent it from absorbing too much paint. Once the primer is dry, paint over the area to match the rest of the wall. You may need multiple coats for even coverage.
Common Complications in Wall Repair
Uneven Surface: If the patch or joint compound isn't applied smoothly, it can result in a noticeable bump or dip.
Cracking: If the joint compound dries too quickly or is applied too thickly, it can crack.
Visible Seams: Without proper feathering of the compound, the seams around the patch may be visible.
Paint Mismatch: It can be challenging to match the exact color and texture of the original wall paint.


Costs in London for Professional Hole Repair
At Brockley Builders, we offer professional plasterboard repair services to ensure a flawless finish. Here are the typical costs:
Small Holes (up to 1/2 inch): £50 - £75
Medium Holes (1/2 inch to 6 inches): £75 - £150
Large Holes (greater than 6 inches): £150 - £300
Prices vary depending on the complexity and extent of the damage, as well as any additional painting and finishing work required.
FAQs on Hole in Wall Repair
1. Can I repair a hole in plasterboard myself?
Yes, with the right tools and materials, repairing a hole in plasterboard can be a straightforward DIY project. However, for larger or more complicated repairs, you may want to hire a professional.
2. How long does it take to repair a hole in the wall?
The time required depends on the size of the hole and the drying time for the joint compound. Small repairs can take a few hours, while larger repairs may take a couple of days due to multiple layers of compound and drying time.
3. What if the paint doesn’t match?
To avoid mismatched paint, use leftover paint from the original job or take a sample to a paint store to get an exact match. Alternatively, consider repainting the entire wall for a seamless look.
4. What causes cracks in the joint compound?
Cracks can occur if the compound is applied too thickly or dries too quickly. Applying multiple thin layers and allowing adequate drying time can help prevent this issue.
5. Can I use spackle instead of joint compound?
Spackle is suitable for small holes and cracks. For larger repairs, joint compound is preferred due to its strength and flexibility.
6. How do I prevent future damage to the wall?
Install door stoppers to prevent doorknob damage, and be cautious when moving furniture or performing activities near the walls. Reinforcing high-traffic areas with more durable materials can also help.
Conclusion
Repairing a hole in your plasterboard wall is a manageable DIY project with the right tools and techniques. By following these steps, you can restore your wall to its original condition, saving time and money on professional repairs. However, if you prefer a flawless finish without the hassle, consider hiring Brockley Builders for professional and reliable service. Happy fixing!


Comments